Pro Tools Plugin
Now you can use Respeecher’s voice models from directly within Avid’s Pro Tools to replace your audio recordings with synthesized voices - there’s no need to download, convert, or upload audio anymore.
Download the Plugin
To use the Respeecher plugin, create a Respeecher Marketplace account and choose any plan that includes Speech-to-Speech conversions - any plan except for "TTS only".
Note: This is a beta version of the plugin.
Want to share feedback? Message us at email@respeecher.com.
Features:
- Speech-to-Speech conversion
- 40+ male, female, and children's voices
- Pitch adjustment
- Conversion to accented voices (for English only)
- Text-to-Speech conversion (coming soon)
- Singing voice conversion (coming soon)
Requirements:
Requirements for both MacOS and Windows are the same as for Pro Tools.
Setup/Installation
Open the installer package and follow the installation instructions.
Within a Pro Tools session you can access the plugin from the AudioSuite plugin menu.
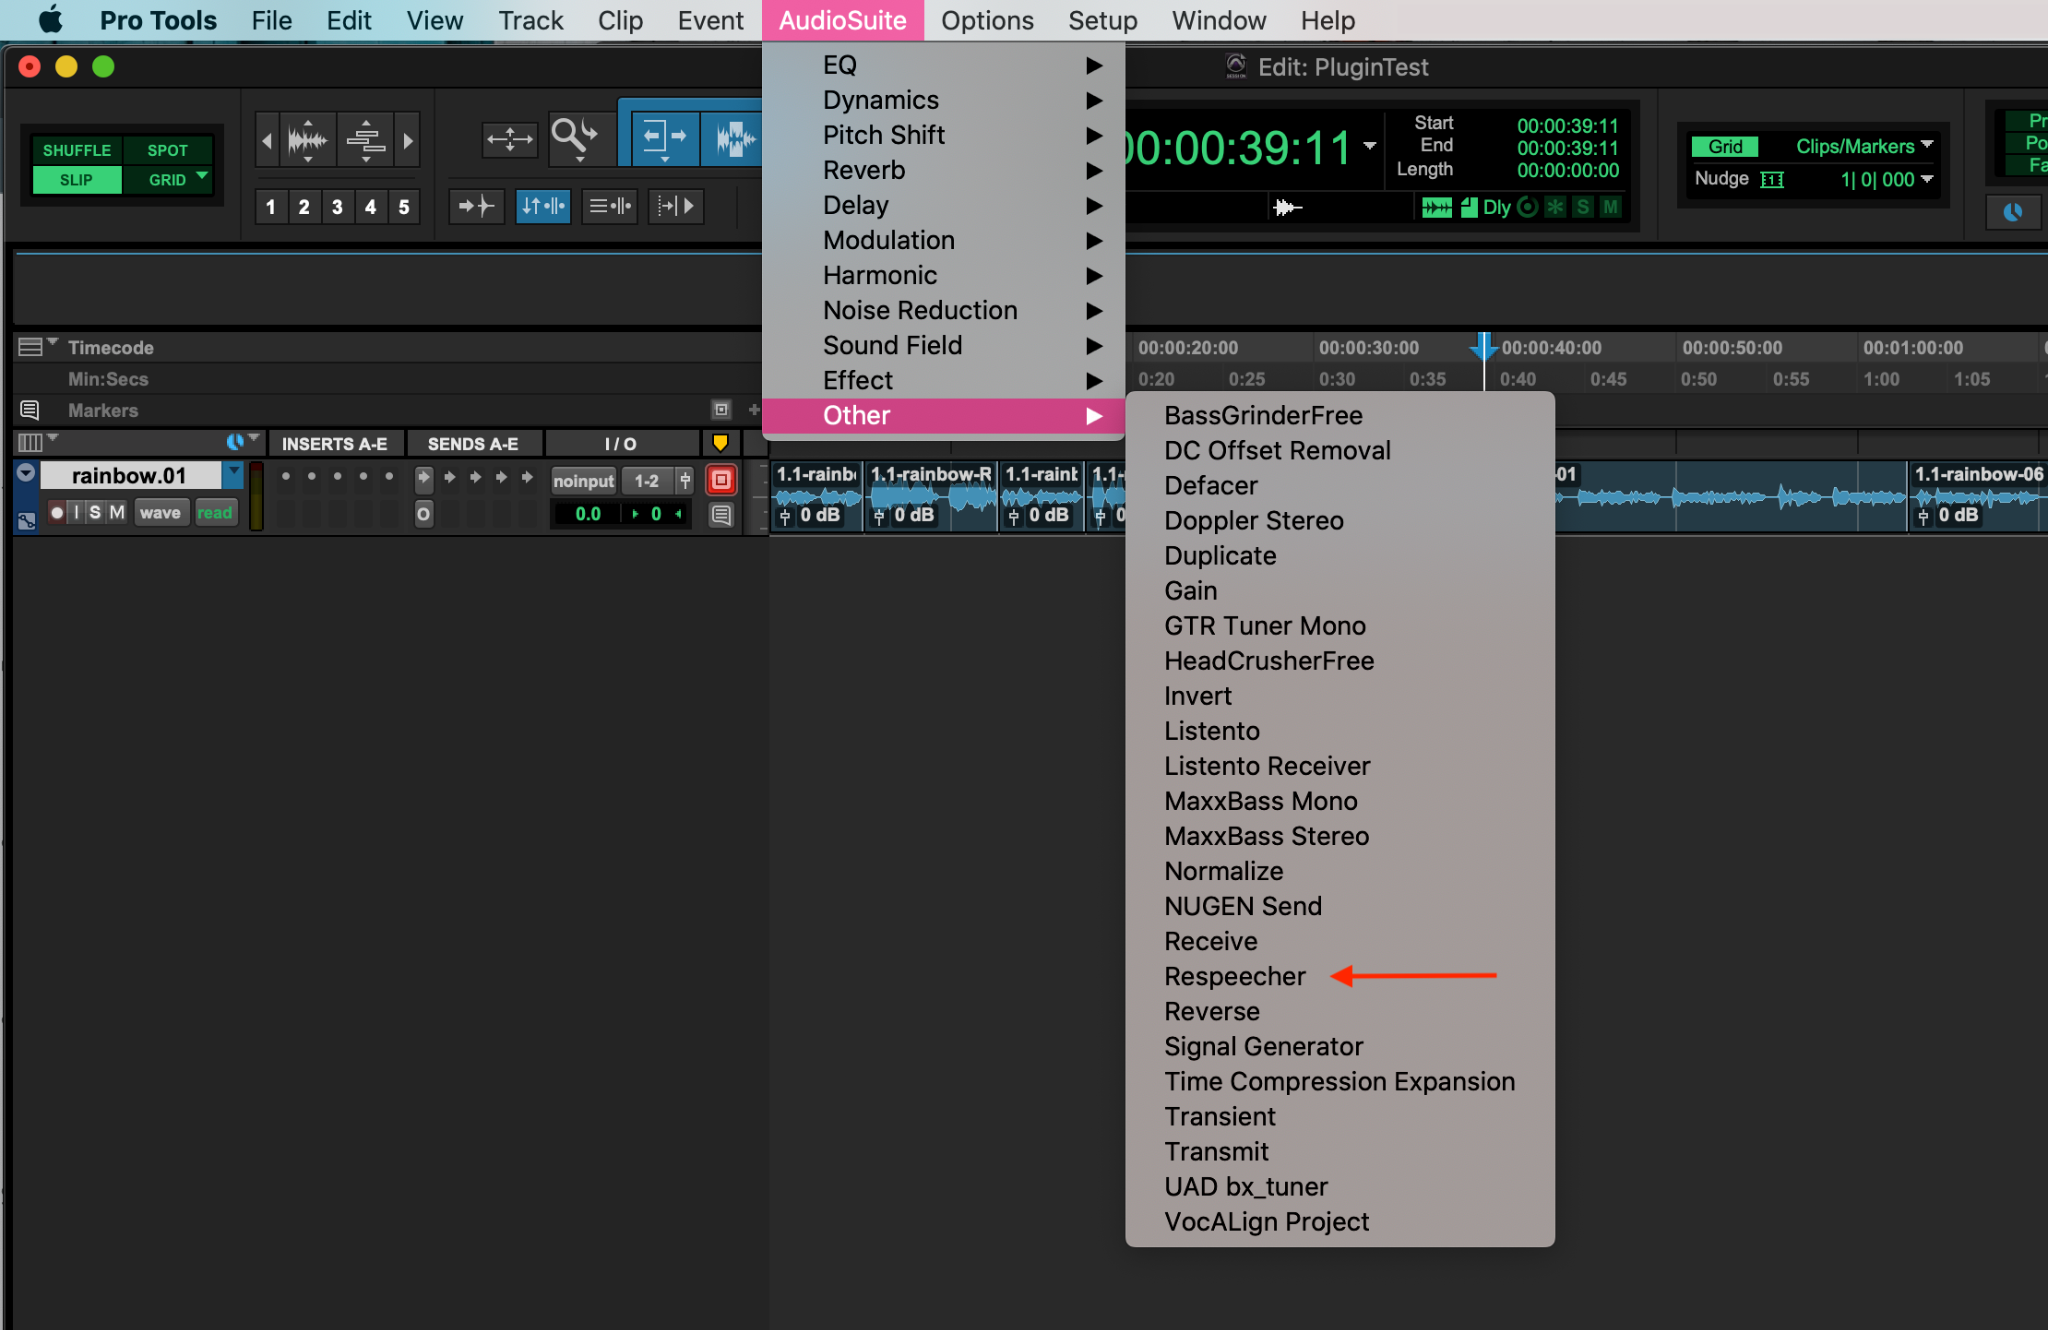
If you have it sorted by category, you will find it under “Other”.
How To Use
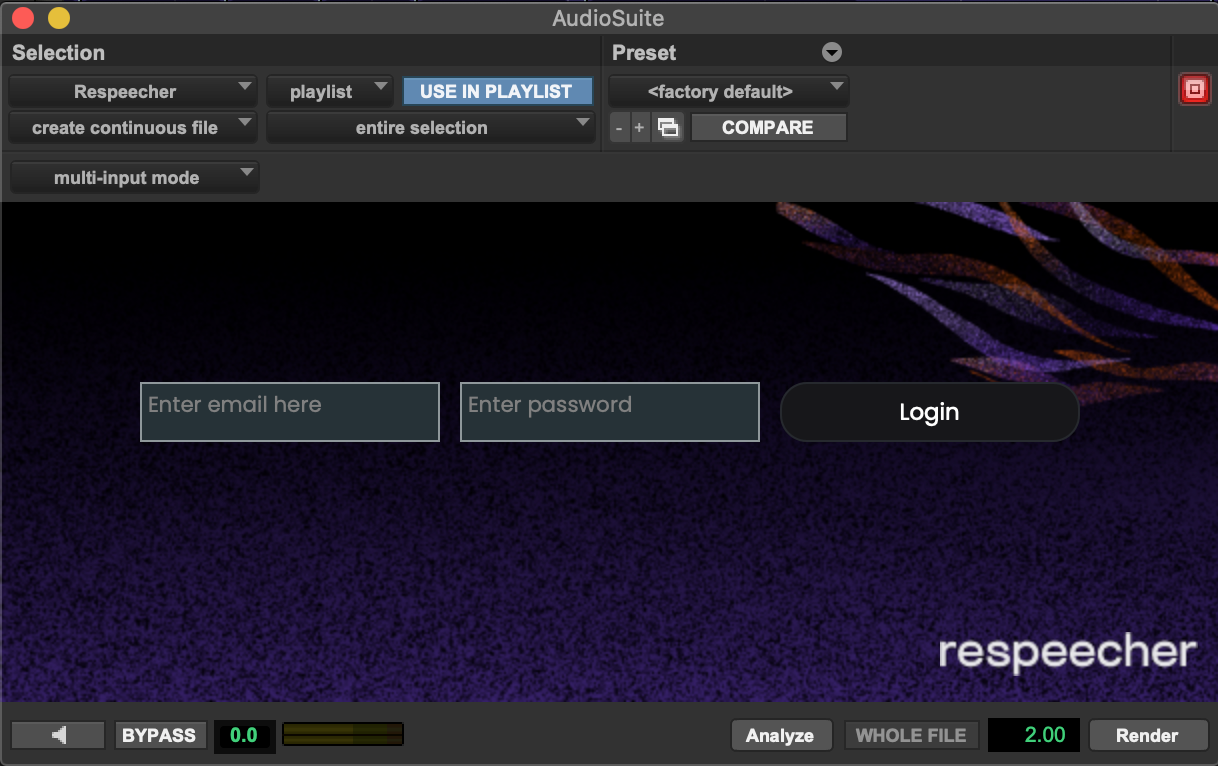
If this is the first time you have used the plugin you will be asked to provide your username and password for your Voice Marketplace account.
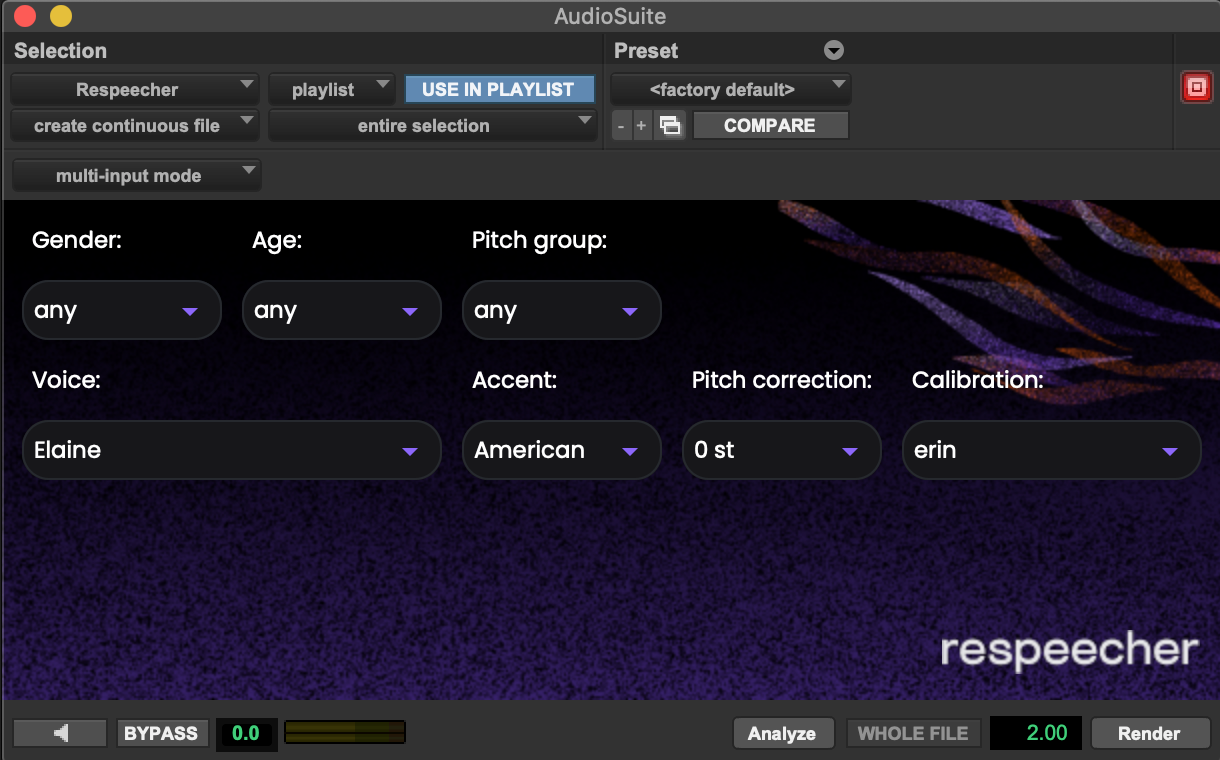
To choose a voice to convert to, click on the “Voice” selection box. You can also filter the voices based on Gender, Age, and Pitch group.
To audition some voices you can do so from our “Audition Voices” page: https://marketplace.respeecher.com/audition-voices (Note: you must be signed in to the Voice Marketplace to access)
You can select the accent for conversion in the “Accent” box.
To adjust the pitch of the target speaker you can use the “Pitch Correction” selection box,
You’re going to want to make sure that the final pitch falls within the target voice’s natural range to maintain quality. This pitch correction happens within our model and is different from pre or post-processing with a tool like Melodyne.
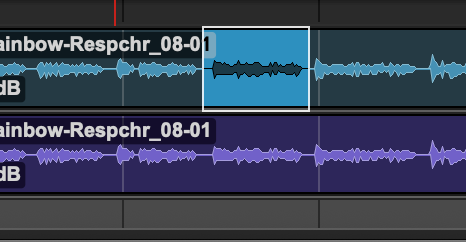
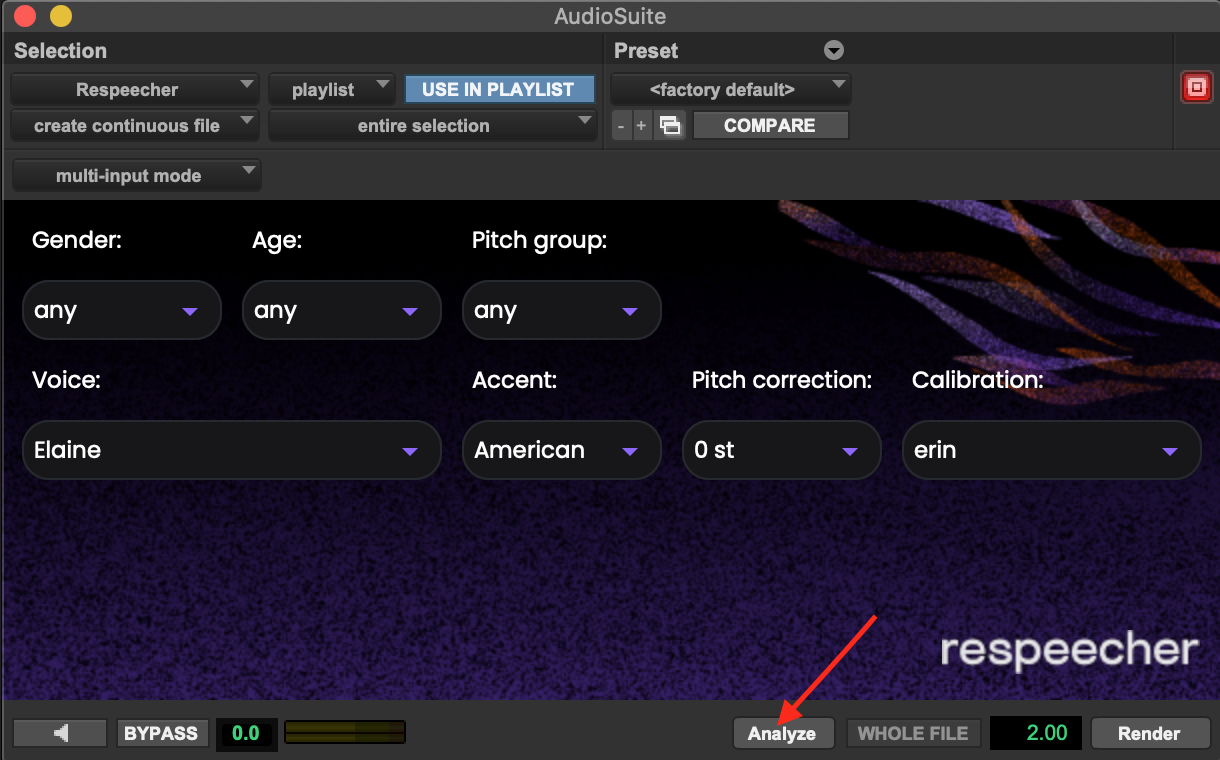
To convert audio, first make a selection of the audio with your cursor. Next, click the “Analyze” button and a progress bar will show up.
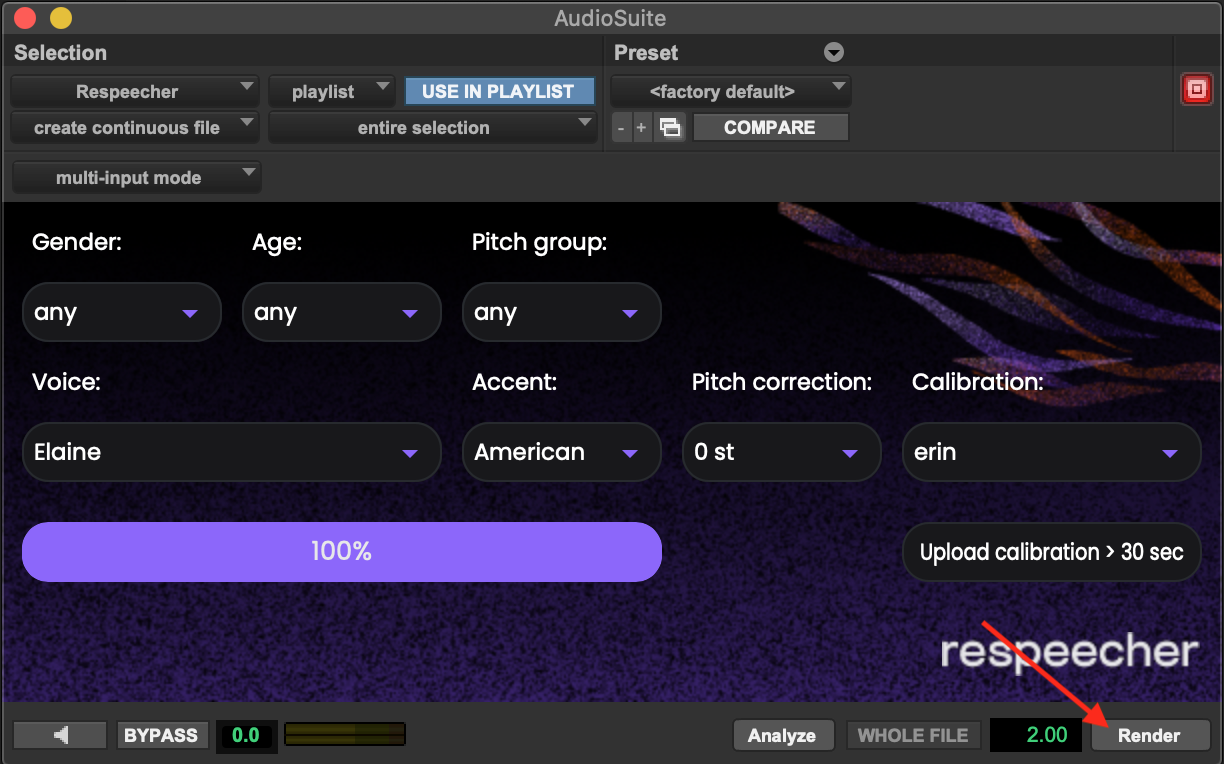
Once the progress bar disappears you can click the “Render” button and your conversion will process in place. Now you can listen to your conversion.
For more control, you can set your own calibration by uploading a calibration recording. We measure the average pitch of a calibration recording to decide how much and in what direction to shift the pitch when converting to the target speaker.
To upload a calibration recording, select the audio for calibration, then click “Upload Calibration”. The new calibration will appear in the Calibration box.
For more information, check out our video tutorial below.
If you have any problems, message our support team.
Thanks for checking out Respeecher’s new plugin for Pro Tools!